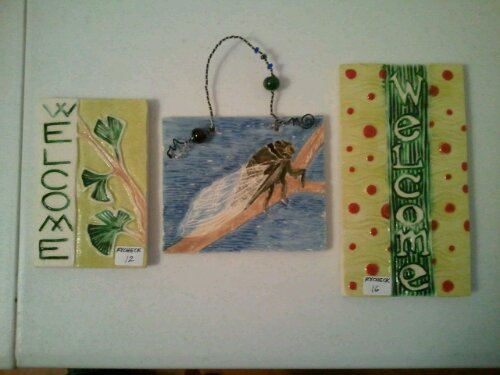
I finally finished Pete and Carol’s tiles last week and they picked them up Tuesday (yeah!).
Now it’s time to make some work for the June “Art for the Garden and Home” show.
Save the dates- June 7-9th up at the top of Wimer St. in Ashland, OR.
447 Pape St. And 421 Prim St. Both just off Wimer. There will be tons of signs!
Times are from 10-5 Friday and Saturday, and 10-3 on Sunday.
Mary Dee’s garden is also on the Ashland Garden Tour-so plan ahead Sunday so you have time to see both the art and the plants.
I’m beginning this week by making my ceramic plaques.
I roll out my clay the ol’ fashioned way with a big rolling pin, just like making biscuits!
Next, I roll handmade stamps across the slabs to create texture
After the clay sets up for half a day or so, I cut it into the basic sizes I’ll use for the individual plaques.
Then I wait several more hours, or overnight to add carved details like wording, or individual designs.
Once the tiles are completely dry, they get their first firing, or bisque (1830°F).
It takes about 12 hours for the kiln to come up to temperature, and 12 hours to cool.
After that, I either glaze them using handpainting of glazes or underglazes for color-and spray with a clear glaze if needed.
Then a high firing up to cone 5 (2185°F) for another 12 hours.
After the tiles have cooled for about 12 hours, I can touch them without burning myself.
I add hanging wires and beads to some, others have built in wires on the backs. And little felt dots so your wall won’t scratch!
And that’s why it takes so long to make these little guys and why they aren’t $2 each! Lots of love and attention is taken with each piece, and no two are exactly the same.
I also make these to order-so keep me in mind for addresses, special messages, new homes, etc. But give me at least two weeks to a month to get it done!
Here’s the address tile I made for my house.
I can do most any color, but I can’t really color match-as that’s a crazy process I prefer not to get too into if possible. But try me 😉
This is just one of the ways I make these tiles.
I’ll save the other subtractive method for a future post.
Hope you enjoyed your mini tutorial!
Karen Rycheck is a ceramic artist creating one-of-a-kind works of whimsey to bring joy to your everyday living. Her work can be found at craft shows and the Memory Den PDX.